There is no better way to share your ideas, opinions, and expertise than with your own blog.
Thankfully, creating a blog is easier today than ever before.
Where once building your own website required years of experience building up coding and design skills, the typical user can be up and running in no time at all.
On this page, you will find everything you ever wanted to know about blogging and how you can start your own blog today!
Everything You Ever Wanted to Know About Blogging
Before we jump into the tutorial, we will begin with the most common questions sent in by readers just like you…
How long will it take to set up my own blog?
If you follow the instructions that I lay out on this page, it should take you around 20 minutes to get up and running.
In this guide, you will learn how to choose a platform, figure out a domain name, find a web host, customize your website, and begin adding blog posts.
Don’t worry, it’s easier than it sounds.
How much time should I expect to dedicate to my blog?
The amount of time you dedicate to your new blog is completely up to you.
It is worth noting, however, that when it comes to blogging, what you put into it is what you’ll take out of it.
There is a direct correlation between blogging success and the amount of time, effort, and the number of posts you contribute to your blog.
For context, this article took around ten hours to create from conception to publishing.
Can I start a blog for free?
You’ve probably come across websites that advertise a free blogging feature, but if you are truly looking to create your own corner on the internet, I highly recommend treating it as an investment.
The reason for this should be obvious.
Not only does paying for your own website give you legitimacy, it also gives you full control over your entire website. That means only the things you want to appear on your site will appear.
Depending on the host you end up choosing, expect to shell out around $5 to $15 per month.
Can I get paid for my blog writing?
You haven’t even created your blog yet and you’re already thinking about monetizing it!?
Well, truthfully, I don’t blame you. After all, there are plenty of bloggers who make tons of money doing what they love. And it’s all passive income!
The amount of money you can earn from creating your own blog depends on how many visitors you can bring to your site. These users are instrumental because they will click on your Google AdSense ads and purchase items from your uniqe links. Some popular bloggers even manage to get sponsorship deals.
As I stated earlier, it’s all about the effort you put into it.
How to Start Your Own Blog Today
Now that you know everything about blogging, you can begin working on a blog of your very own.
Step 1: Choose a Blogging Platform
There are dozens of blogging platforms to consider and you’ve probably heard of many of them: there’s Tumblr, Medium, and even Twitter is considered to be a microblogging platform.
All of those platforms are great, but if you really want to make your blog your own, I highly recommend WordPress.
WordPress is a free, open-source platform that is easy to use and very beginner friendly. It also has a great blogging tool that enables you to have complete control over the look of your content.
Additionally, WordPress has thousands of pre-made templates and functionality-adding plugins available for you to choose from, enabling you to make a website that is as unique as you are.
WordPress is trusted by over 90% of blogs on the internet (including this one) and there is no platform that we recommend more highly.
Step 2: Select a Domain Name
 The right domain is a crucial part of your blog because it creates the first impression for your users. It is your own personal brand.
That is why selecting the right name is so important.
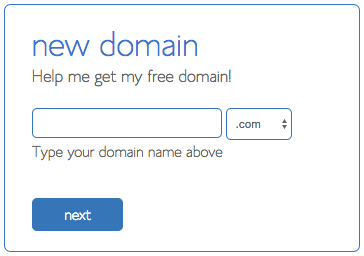
But wait, what’s a domain name, anyway?
A domain name is a string of characters that identifies your website. It is generally written out similar to this: www.example.com.
When it comes to choosing the best name for your website, there are three things you should keep in mind.
- Keep it concise. A shorter domain is ideal, especially if you expect many people to type your website name directly into the search bar of their browsers (as opposed to finding you on search engines). For what it’s worth, the most popular websites on the internet have an average of six characters in their domains.
- Use keywords. Remember when I told you that a domain name can make a first impression to users? Using keywords related to your field of writing is a good way to indicate to visitors exactly what they’re in for. It also has the added benefit of increasing your website’s positioning on search engines.
- Mind your extension. You probably know about the ‘.com’ extension, but did you know that there are hundreds of other extensions to choose from, including ‘.pizza’ and ‘.business’? While it may be tempting to use those extensions, they are simply not prevalent enough for me to recommend. Instead, just play it safe and select a domain using the ‘.com’ extension.
Step 3: Find a Web Host
A web host makes your website available to visitors on the internet. It stores all of the files that comprise your blog including text, photos, and videos. Without a web host, you won’t be able to create your own website using WordPress.
Because a web host will determine how fast your website loads, how much content you can add to your page, and how much your blog will cost to keep online, it is important to find the right one.
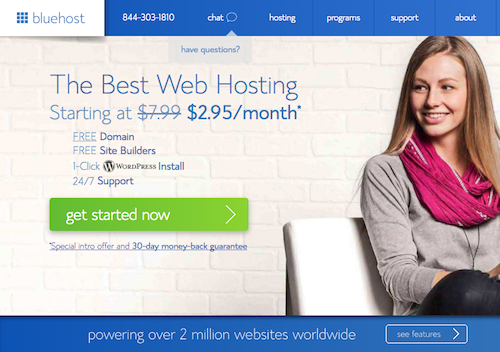
There are literally hundreds of different web hosts to choose from. Sorting through all of them would be an impossible task and instead of trying to convince you of the benefits of each, I will simply refer you to my handy guide to the best web hosting services.
Once you choose your host, you can simply sign up by choosing a hosting plan, entering the domain name you decided on in Step 2, and completing your registration.
One of the benefits of selecting a web host from my guide is they all offer one-click WordPress installation. This takes the somewhat complicated process of installing the platform and turns it into a single-step action. After installing WordPress, you can finally log in to your shiny new blog!
Step 4: Customize Your New Blog
Congratulations on creating your new blog! Feel free to take the time to learn how to use the WordPress interface. It’s designed to provide clear direction for anything you might do.
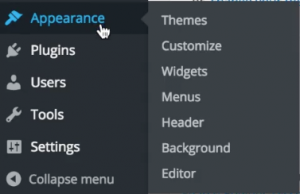 I recommend adding a blog theme as your first step. You can do this by hovering over “Appearance” on your WordPress dashboard and clicking on “Themes” from the pop-out menu.
From there you will be able to select from pre-installed themes and even add your own. There are thousands of different free and paid themes to choose from and finding one that works for you is a project in and of itself.
Spend some time trying out different templates, but don’t get too carried away. One of the biggest benefits of WordPress is that you can change your theme quickly if you ever decide it’s time for a change.
You can also customize your new blog with plugins.
A plugin adds new functions to your website that can range from social media sharing to SEO tools. I highly recommend browsing through WordPress’s extensive plugins catalog and finding some to add next-level customization to your blog.
Step 5: Add Your First Blog Post
Now that your site has the look and feel that you want, you can begin adding content.
Your first blog post can describe the intention of your site or you can just jump in by writing about whatever it is you created your blog for in the first place.
To add your first post, simply hover over the Posts section on the sidebar menu and click Add New. You will be directed to an interface that looks like this:
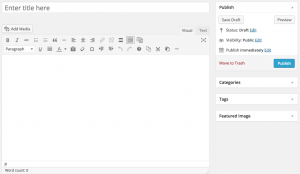
As you can see, it’s pretty self-explanatory. There is a place for the title of your article, the content, editing tools, SEO tools, and publishing tools.
If you have ever used a word processor like Microsoft Word, the WordPress editor should seem like a piece of cake in comparison.
Feel free to test different features, add functions, and make mistakes. The best way to learn WordPress is to simply use it. Once you get the hang of it, you will be spinning more content than your users will be able to keep up with.
Congratulations on creating your first blog!